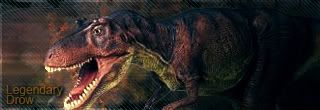
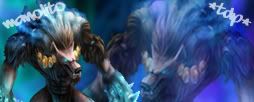
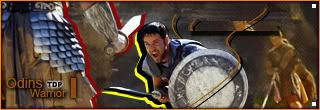
Post by Matt on Mar 22, 2007 20:30:34 GMT -5
The first thing you do is open cs2, make your background one colour, I suggest black or white to start with, and render your image.

From there you duplicate your image by right clicking the layer in the layers window and clicking duplicate as seen here:

your layers window should now look like this:

now select the smudge tool,

and go to your brush selection in the top left corner, and select the last brush you see here, entitled charcoal. you'll know its title by moving your mouse over it, as it shows the brushes name here in the bottom right.

From there you may want to hide the top most layer, by clicking the eye symbol to the left of it.
Give very very small strokes either from left to right or up to down (or vise versa) on the now only visible render layer and once you release, it should give you your first smudge. Continue until your layer is completely smudged,

Now when you make your other render visible it should look like this;

But before you decide to keep it that way I suggest duplicating this smudge method until your background is just about covered. You can move and arrange your smudge images to achieve this.
From here all you need is a couple tricks. one of which Ill give you now is the color balance, which can be found at the bottom of your layer window by clicking the half black half white box, you should see it here (at the very bottom close to the center) adjust it to you likings, try not to over do it.

Now keep with that until you get better at it and learn some tricks/read some tuts, eventualy you'll get some nice resaults.
This was mine:

Not my best, because I was busy trieing to break it down into steps for this tut, but as you can see its a decent banner. Also notice the colour change from start to finish because I used the colour balance.

From there you duplicate your image by right clicking the layer in the layers window and clicking duplicate as seen here:

your layers window should now look like this:

now select the smudge tool,

and go to your brush selection in the top left corner, and select the last brush you see here, entitled charcoal. you'll know its title by moving your mouse over it, as it shows the brushes name here in the bottom right.

From there you may want to hide the top most layer, by clicking the eye symbol to the left of it.
Give very very small strokes either from left to right or up to down (or vise versa) on the now only visible render layer and once you release, it should give you your first smudge. Continue until your layer is completely smudged,

Now when you make your other render visible it should look like this;

But before you decide to keep it that way I suggest duplicating this smudge method until your background is just about covered. You can move and arrange your smudge images to achieve this.
From here all you need is a couple tricks. one of which Ill give you now is the color balance, which can be found at the bottom of your layer window by clicking the half black half white box, you should see it here (at the very bottom close to the center) adjust it to you likings, try not to over do it.

Now keep with that until you get better at it and learn some tricks/read some tuts, eventualy you'll get some nice resaults.
This was mine:

Not my best, because I was busy trieing to break it down into steps for this tut, but as you can see its a decent banner. Also notice the colour change from start to finish because I used the colour balance.


